Setting Live View Quality for Annke Vision Device
Purpose:
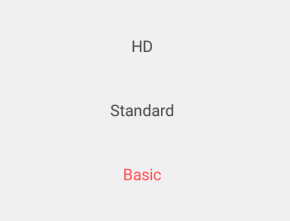
Three pre-defined image qualities are provided in this client for Annke Vision device: Basic, Standard, and High Definition.
Note: The function should be supported by the device.
Steps:- On the live view page, select a camera in the multi-window division mode.
- Tap
 to enter the quality switching panel.
 - Tap HD, Standard, or Basic to change the live video's quality.
- Basic is the default video quality.
- The quality types may be vary according to different devices.
- The icon may vary according to the actual video quality.
Or double tap the target live view window to enter the 1-window division mode.

Basic: Basic video quality.
Standard: Standard video quality. (The video quality is higher than Basic and lower than HD.)
HD: Video image with high definition.
Notes:
Setting Live View Quality for Local Device
Purpose:
Two pre-defined image qualities are provided in this client for local device: Fluent and Clear. You can also customize the quality.
Notes:
- If you change the image quality, the live view and recording of the device may be affected due to the new settings.
- For local device, you can set the quality as Clear or Fluent.
- In multi-window division live view, you can only select the defined image quality as Fluent. Or you can customize the image quality and the stream type can only be Sub Stream.
Selecting Quality
Steps:
- Tap
 on the live view page to enter the quality switching panel.
 - Tap Clear, or Fluent to change the live video's quality.
Note: The icon may vary according to the actual video quality.
Customizing Quality
Steps:
- Tap
 on the live view page to enter the quality switching panel.
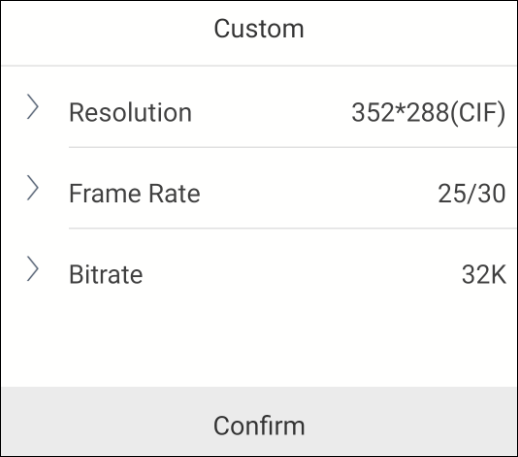
 - Tap Custom to enter the customized panel as shown below.
- Configure the parameters according to actual needs, including Stream Type, Resolution, Frame Rate and Bitrate.
- Tap Confirm to save the settings.
Note: The icon may vary according to the actual video quality.

Note: The live view effect is related to the performance of your network and phone hardware. If the live view is not fluent or the screen appears blurred, you should reduce the resolution, frame rate and bitrate of the camera in Custom mode, or set the image quality to the Fluent mode.
The following table shows the recommended frame rate and bitrate configuration for different resolution at H.264, H.264+ and H.265 video compression by Moto X Pro (CPU: Snapdragon805, Android 5.0.2).
Resolution |
1-ch |
2-ch |
4-ch |
Recommended Configuration |
H.264 (Software Decoding) |
||||
1080P |
√ |
√ |
|
Frame rate: 25fps;Bit rate: 4Mbps |
720P |
√ |
√ |
√ |
Frame rate: 25fps; Bit rate: 2Mbps |
4CIF |
√ |
√ |
√ |
Frame rate: 25fps; Bit rate: 512Kbps |
H.264 (Hardware Decoding) |
||||
1080P |
√ |
√ |
√ |
Frame rate: 25fps; Bit rate: 4Mbps |
720P |
√ |
√ |
√ |
Frame rate: 25fps; Bit rate: 2Mbps |
4CIF |
√ |
√ |
√ |
Frame rate: 25fps; Bit rate: 512Kbps |
H.264+ (Software Decoding) |
||||
1080P |
√ |
√ |
Frame rate: 25fps; Bit rate: 4Mbps |
|
720P |
√ |
√ |
√ |
Frame rate: 25fps; Bit rate: 2Mbps |
H.264+ (Hardware Decoding) |
||||
1080P |
√ |
√ |
√ |
Frame rate: 25fps; Bit rate: 4Mbps |
720P |
√ |
√ |
√ |
Frame rate: 25fps; Bit rate: 2Mbps |
H.265 (Software Decoding. Hardware decoding is not supported.) |
||||
1080P |
√ |
√ |
|
Frame rate: 25fps; Bit rate: 2Mbps |
720P |
√ |
√ |
√ |
Frame rate: 25fps; Bit rate: 1Mbps |
4CIF |
√ |
√ |
√ |
Frame rate: 25fps; Bit rate: 256Kbps |